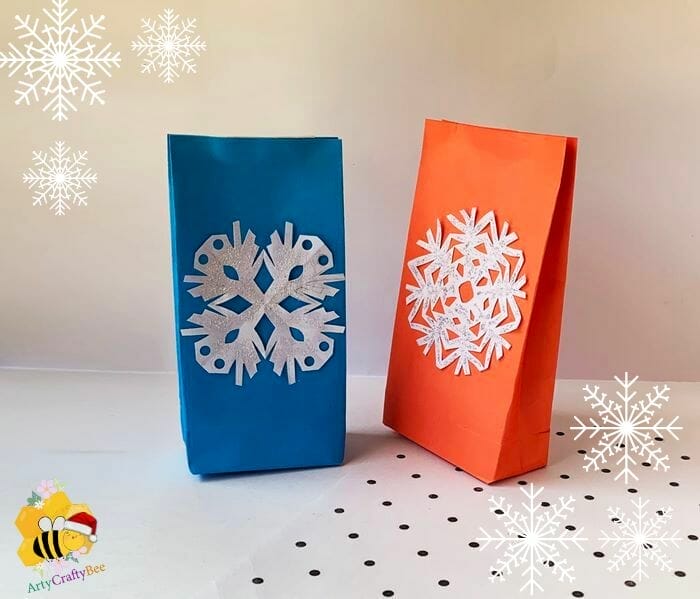
Beautiful Christmas Gift Bags Tutorial (+5 Snowflake Pattern)
Learn how to make a Christmas gift bag out of wrapping paper with step by step instructions
Happy Christmas everyone! The season of joy is almost here.
We are all looking forward to spending this lovely Christmas with our family and friends. I am sure we all have some lovely gift ideas for our loved ones. Here is an easy and great idea for Christmas gift wrapping.
Are you looking for Christmas gift bag ideas? Make the best Christmas gift bags for your loved ones at home. Download paper gift bag patterns for free. Learn how to fold a paper bag for gifts.
Try out this paper gift bag pattern to make your own DIY Christmas gift bags. Use wrapping bags for large gifts from this tutorial.
Supplies You Need For DIY Christmas Gift Bags:

- A4-sized colorful craft papers.
- Pencil.
- Ruler.
- Scissors.
- Glue.
- Glitter.
How To Make Paper Gift Bags Step by Step with pictures:
Download Free Snowflake Cutout Pattern.
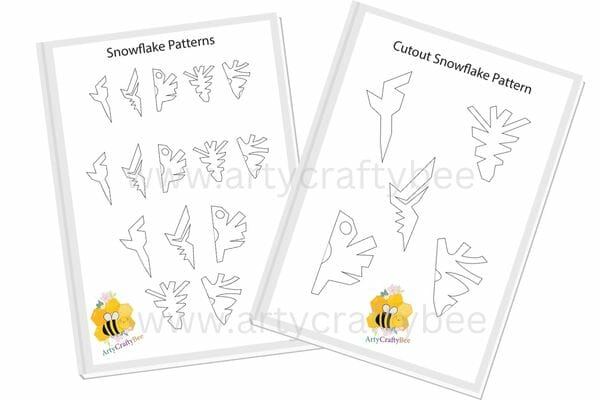
Click Here To Download Free Snowflake Pattern:
The instructions I am about to show you can be used to make bags from any size of paper. You can make large to small paper bags by following this technique.
To make a paper bag using this method you need to select a paper that is in rectangular shape. You can use brown paper and old newspapers. The main material for this craft is any type of paper that is foldable, and glue is the second most important material to make these gift bags.

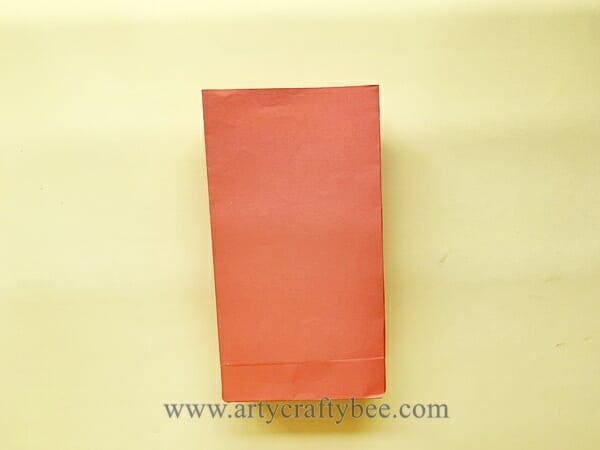
Step 1: Select An A4 Sized Paper:
Today I will be making this Christmas gift bag using an A4-sized red colored paper.
I will be placing my paper horizontally on the surface.

Step 2: Fold left side inward:
Now, I will take the left side of the paper, and bring it right to the middle part of the paper.
Then make a straight fold on the paper. (Fold the left flap of the paper inwards to the centre).

Step 3: Overlap with right side:
Now, bring the right towards the middle of the paper.
Bring it slightly further from the middle point of the paper, and overlap it with the left side.
Apply glue to the overlapped area of the paper.
Allow the glue to dry.


Step 4:Fold The Bottom.
Bring it upwards and make a crease there.
Take 2/2.5 inches from the bottom part of the folded paper. If you want your bag to have a larger button you can fold it more than 2 inches.
Step 5: Open The Fold:
Keeping the bottom folded, you have to spread the two parts of the paper right along the crease we made in the previous step. Press and fold the left and right sides, and make sure both sides are even. You will notice two triangular shapes on the two sides. Make sure the triangles are equal.
Step 6: Bring Bottom Flap Upwards:
Now take the bottom part of the folded area, and bring it upwards to a little further from the line in the centre.
Step 7: Bring Top Flap Downwards:
Now take the part from the top and bring it down to the centre. Overlap the top flap with the bottom flap. Apply glue to the overlapped area. (You can overlap the bottom side with the top side as well).

Step 8: Make Vertical Folds:
In this step, you will need a ruler.
Fold the paper bag from both sides.
If you look closely you will notice square (diamond shaped) folds on the two sides right on the bottom of the paper bag near the overlapped area.
Make the two vertical folds of your paper right from the middle part of the diamond shapes.
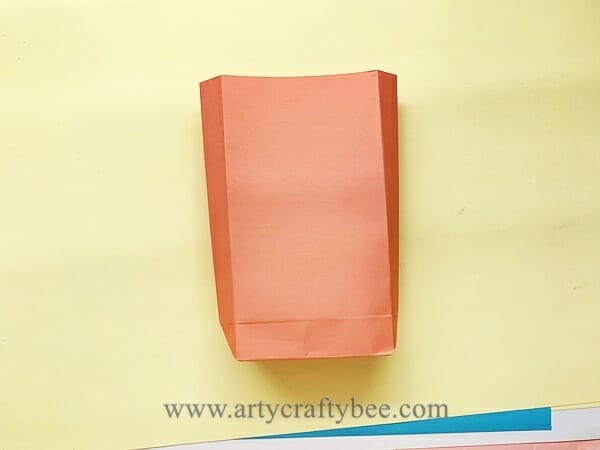
Step 9: Open The Bag:
In this step, just place your hand inside the bag and spread the bag.
Step 10: Prepare The Paper Bag:
Fold the bag along the two vertical folds on the front and back, left and right. Use your hands to even out the bottom part of the bag as well.
This step might seem a little tricky, but once you have opened up the bag (Step:9), just go along the creases we made to prepare your DIY Paper Bag.
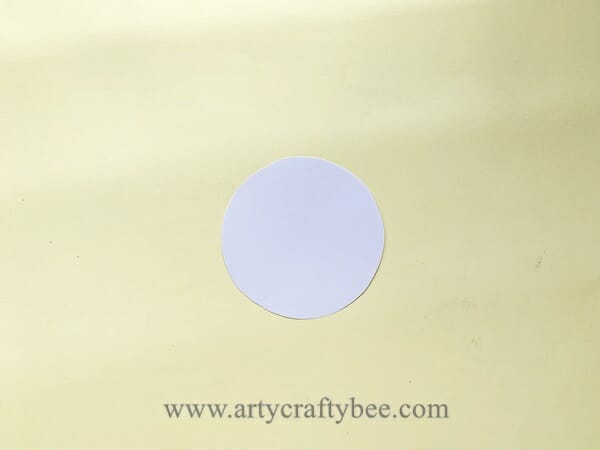
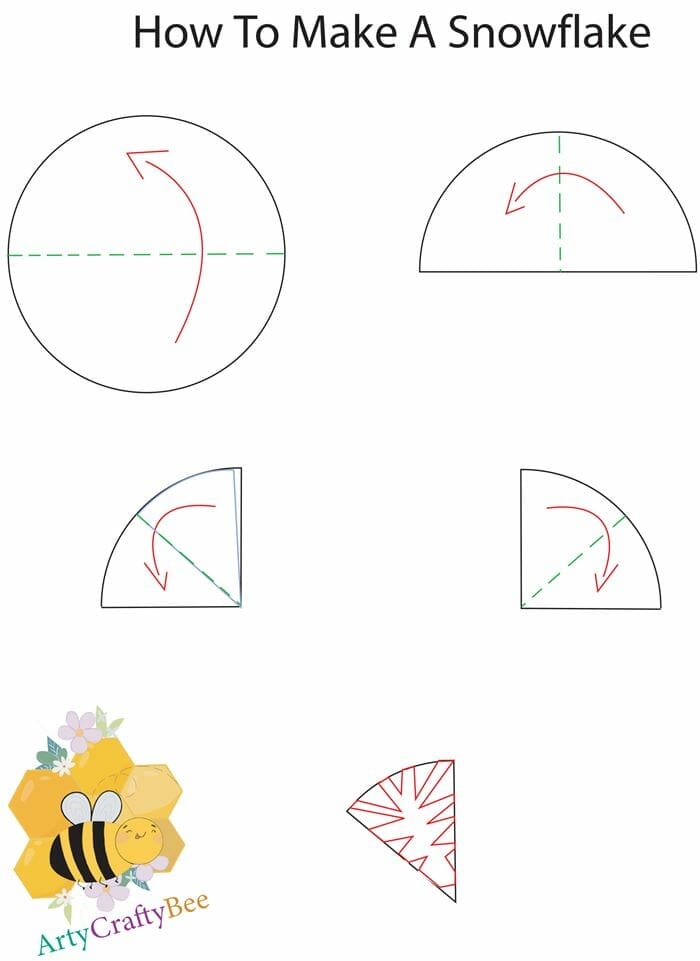
Step 11: How To Make The Snowflake:
For your paper snowflake pattern, measure the width and length of your paper bag and cut out a round piece of white craft paper.
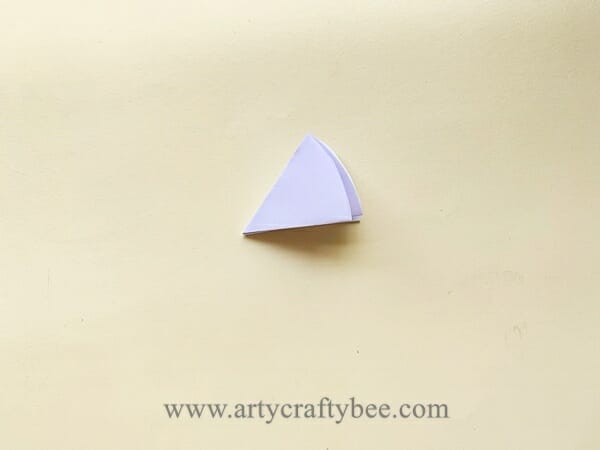
Step 12: Fold The Round Paper:
Take the round white craft paper and first fold it in half, then fold it in the middle. Then, again fold the two sides making 8 folds in total.
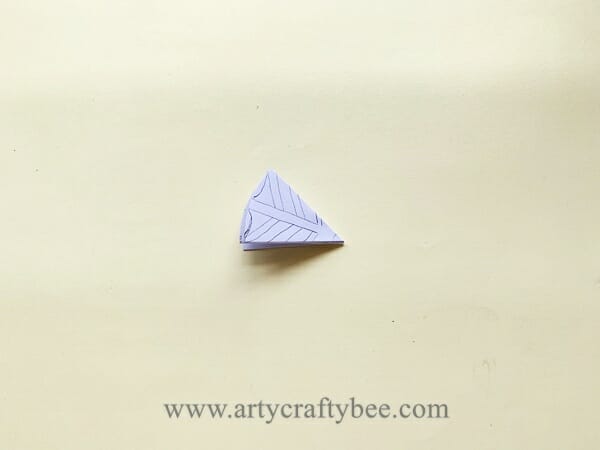

Step 13: Draw The Snowflake Pattern:
Download the attached PDF templates for the snowflake pattern. Use the templates to draw the snowflake pattern on the white craft paper.
Step 14: Cut The Snowflake:
Cutout the Snowflake out of the paper along the pattern.
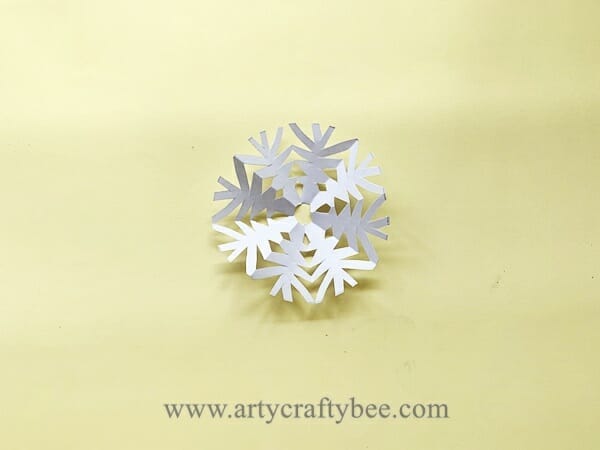
Step 15: Open The Fold:
Open up the folds to reveal your paper snowflake pattern.
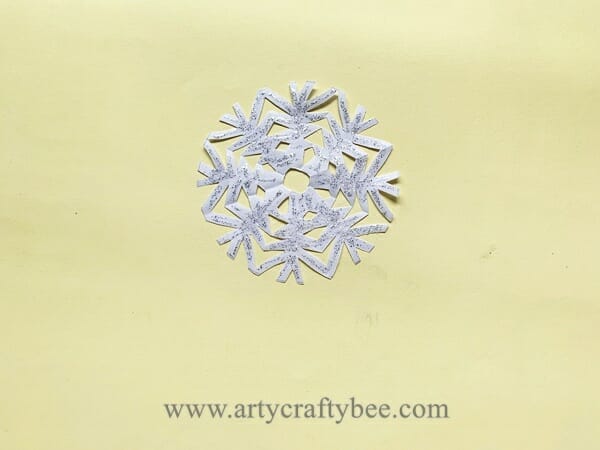
Step 16: Add Glitter:
Use silver or white glitter to decorate your paper snowflake:
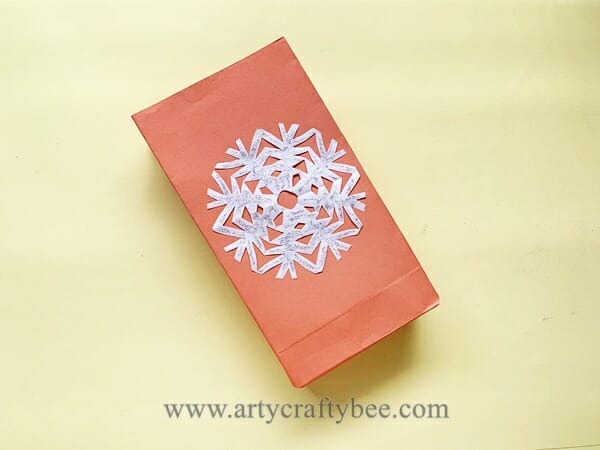
Step 17: Glue The Snowflake:
Glue the paper snowflake on your paper Christmas gift bag.
Extra notes: Use a paper punch machine to punch holes on the top of the Christmas gift bag to tie some handles with twine or ribbons.
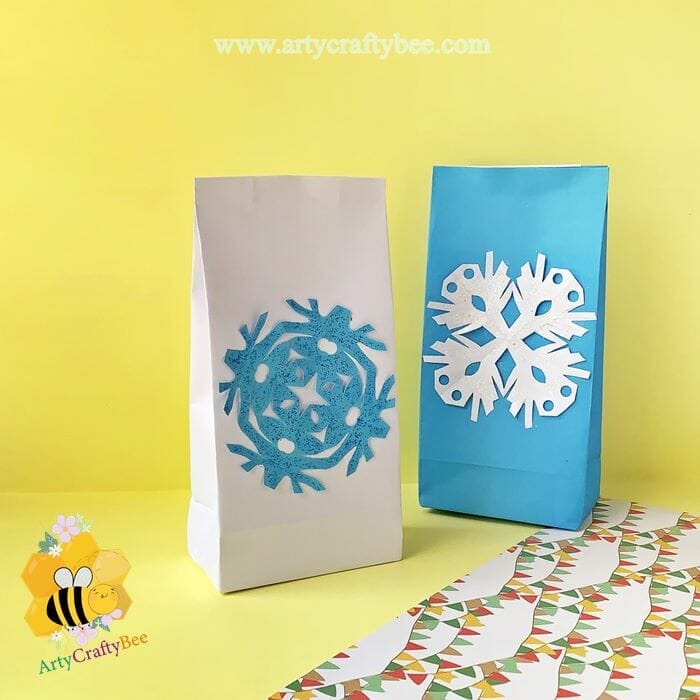
How To Use This DIY Christmas Gift Bag Craft::
If you want to add some extra love and care to your friends and family this Christmas these DIY Paper Christmas gift bags are a great idea. Nothing shows more care than handmade gifts. Use different-sized paper to make different-sized paper bags for gifts. These gift bags are suitable for large and also small gifts. You can use brown wrapping papers, old newspaper and craft papers to make gift bags using this method.
Easy DIY paper bag craft for kids and adults. This origami paper bag tutorial for beginners is easy to make. This tutorial is to learn how to make a paper bag without cutting. Make your own paper bag for gifts
Discover More Of Our Crafts:


Here are few more similar crafts from other craft content ceators: