Halloween Witch Craft Paper Bag Puppet (3 Templates)
In the world of Halloween crafting, one activity that stands out for its creativity and spooktacular fun is creating Halloween witch craft for toddlers. If you are looking for fantastic Halloween witch craft ideas to do with your kids, crafting Halloween witch paper bag puppets is an excellent choice. In this step-by-step craft tutorial, we will show you how to make preschool Halloween witch craft.

Halloween is one of the most fun times of the year. Kids surely enjoy dressing up in different fun and spooky characters. all the candies they can eat without limits, what is most fun is hearing spooky stories. How can you tell a great Halloween story without a puppet? That is why we have made this adorable paper bag witch puppet for you guys.
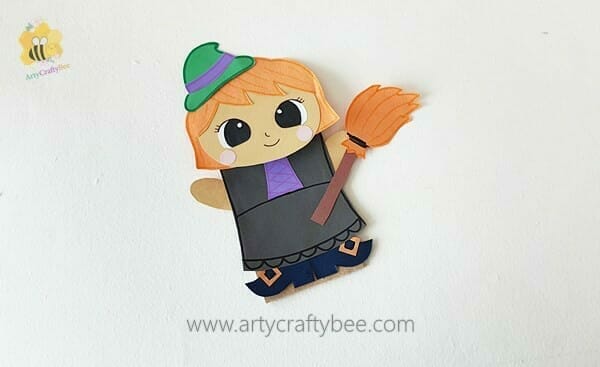
Halloween Paper Bag Witch Puppet

Materials
I want to keep this craft as simple as possible so that you don’t have to spend plenty to make this preschool Halloween witch craft. I have listed the materials and supplies carefully so you can easily gather them.
Brown Paper Bags.
Colorful Construction Papers.
Craft Papers.
To make our Halloween witch craft paper bag puppet the main thing you need is a paper bag. Find a paper bag that is large enough to fit in your hand.
The second most important material is craft paper. You need colorful craft papers and construction papers to make the Halloween witch paper craft.
Supplies:
Scissors.
Pencil.
Ruler.
Glue.
Marker Pens.
Free Paper Bag Puppet Templates

Once you have gathered all the listed Halloween craft supplies to make your Halloween witch craft now we need to move on to the next step. Let’s make our Halloween witch craft paper bag puppet.
Step 1: Halloween Witch Craft Printable

Download the printable template from the link above. Select colorful construction papers.
Cut out the templates carefully using scissors. Then place the templates on colorful craft papers and cut them out.
You can also use carbon paper to trace the shapes instead of cutting them out.
Use an X-acto knife to carefully cut along the yellow outline on the witch’s hair’s template.
Step 2: Decorating the Witch’s Hair


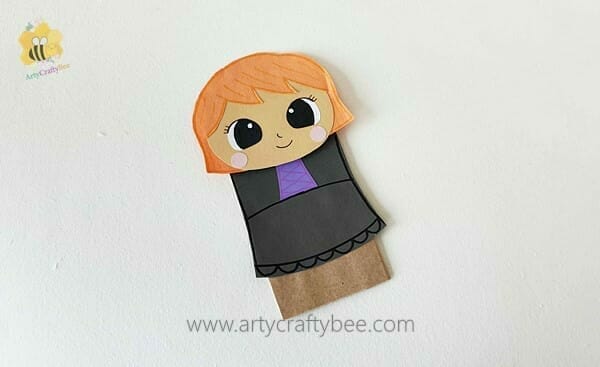
Take the circular head shape and place it through the slit of the hair. Apply glue on the back to secure the witch’s head with the hair.
Step 3: Decorating the Witch’s Face:

First, glue the two large eyes on the witch’s face.
Then, glue the two pink cheeks beneath the eyes.
Use a black gel pen to draw the witch’s mouth and nose.
Step 4: Decorate The Witch’s Dress:

Take the purple cutout and glue it on the top part of the black dress.
Use a marker pen to draw outlines on the dress.
Draw wavey lines on the bottom of the dress to add more details.
Step 5: Preparing The Paper Bag

If you don’t have a paper bag with the right size, you can always make one from scratch. All you will need is some large brown paper or a newspaper.
Check out this tutorial on how to make a paper bag with easy step-by-step instructions.
Step 6: Make The Witch Puppet:


Glue the witch’s head on the bottom of the paper bag (closed-end).
Then glue the dress on the body of the paper bag.
Glue the witch’s shoes on the bottom of the paper bag.
Step 7: Adding Accessories


Use the templates to make the witch’s broom and hat.
Then, glue the broom with the witch’s hand and glue the hat on top of the witch’s head.
Tips For a Spooktacular Witch Puppet
Here are some additional tips to ensure your Halloween witch craft paper bag puppet stands out:
Measure the size of your paper bag and the witch’s template to get the right size of bag for the puppet. All the templates are in A4 size.
You can try out different color combinations to make your witch paper bag puppet look unique.
You can use googly eyes instead of paper cut-out eyes to make it look more details.
If you love making Halloween Witch Craft you can also make these fun crafts we’ve made previously.
Halloween Witch Doll Mixed Media Craft Fun (2 printables)
Easy Witch Halloween Pop Up Card (+2 Templates)
If you have enjoyed learning how to make this paper bag witch puppet with us please leave a comment. Please show us some support by subscribing to our Arty Crafty Bee family.


