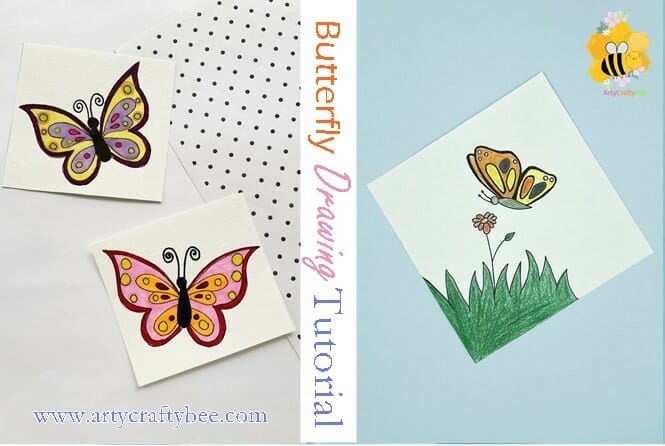
Paper Butterfly Toilet Paper Roll Craft
As you know I love to make toilet paper roll crafts for kids. With the spring season coming I thought to myself why don’t I make a paper butterfly craft? I made this butterfly craft activity for kids with paper butterfly-cutting patterns that are easy for kids to trace.

Toilet paper roll craft ideas are not only fun to make but they send the kids a good message about recycling. I have made plenty of toilet paper roll crafts in my blog, last year I made a 3D toilet paper roll owl people seemed to like the owl craft a lot and I was very pleased with it as well.
So let’s see how we can make this paper butterfly tissue paper roll craft. And after we are done making the craft I have some fun facts about butterflies for you. If you want to know where butterflies come from please stay tuned.
How To Make Tissue Paper Roll Butterfly
Download Templates
Click To Download Free Printable Templates.
List Of Supplies and Materials
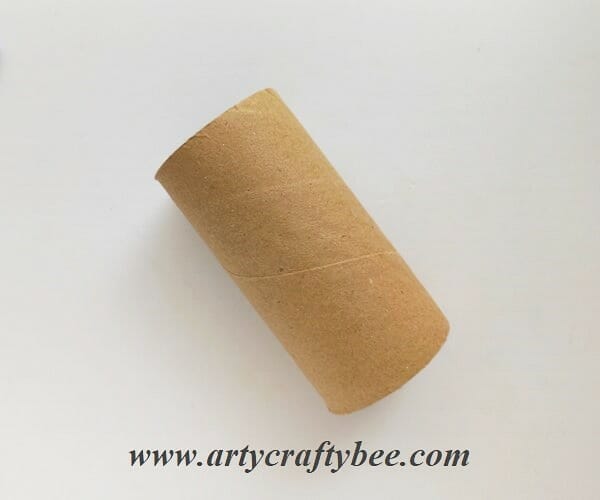
- Toilet Paper Roll/Tissue Paper Roll.
- Colorful Craft Papers.
- Colorful Pipe Cleaner.
- Pencil.
- Ruler.
- Scissors.
- Glue.
- Colorful Marker Pens.
Instructions: How To Make Tissue Paper Roll Butterfly
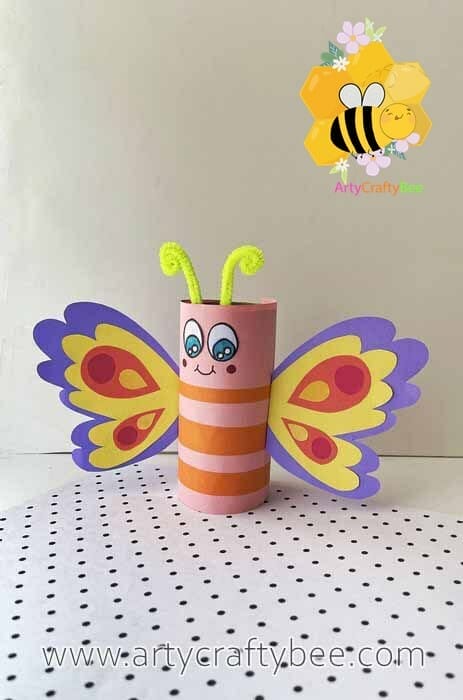
Step 1: Paper Butterfly Cutouts
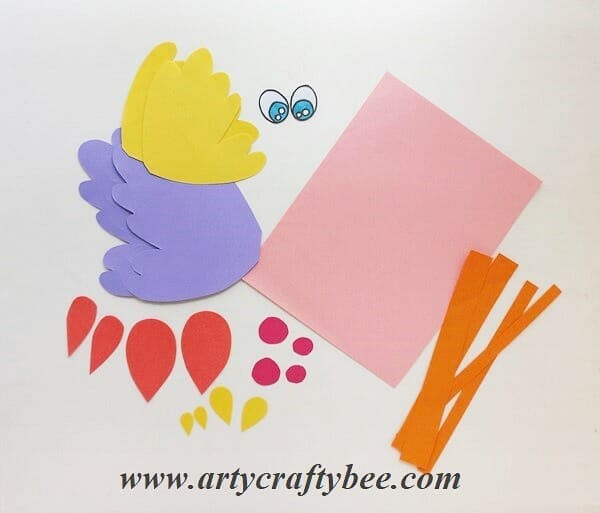
Once you have printed the templates you need to cut out your paper butterfly cutouts from the PDF templates.
Use the template cutouts to trace the paper butterfly patterns on colorful craft papers and cut them out carefully using scissors. Use a blue colorful sharpie to fill in the paper butterfly’s pupils.
Step 2: Make The Paper Wings
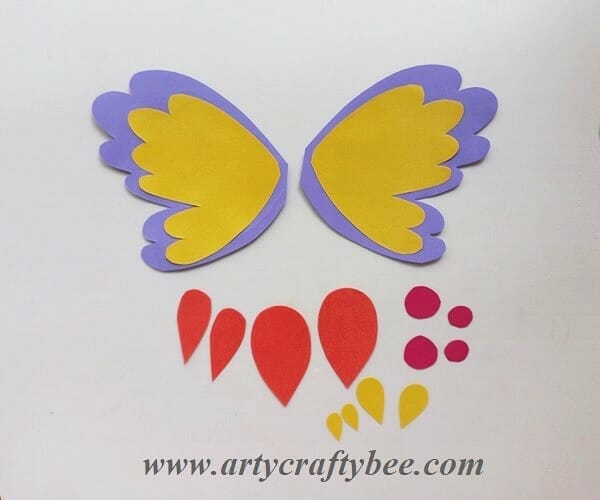


Glue the yellow butterfly wing cutouts (smaller wings) inside the purple butterfly wing cutouts (larger ones).
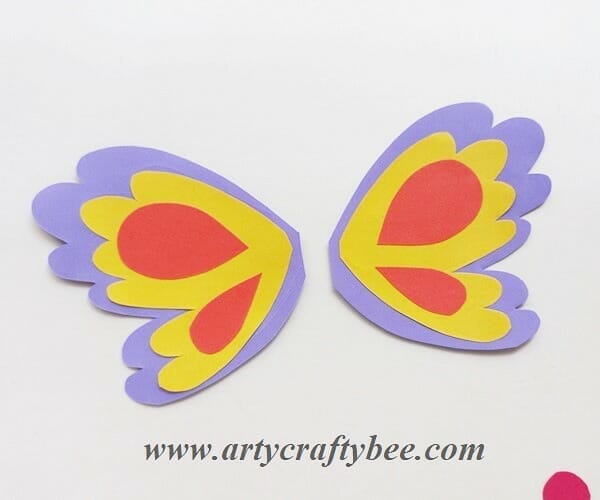
Then, glue the large red teardrop-shaped patterns on the top part of the yellow wings.
Glue the small red teardrop shapes on the bottom part of the yellow wings.
Glue the large pink dots on the large side of the teardrop shapes.
Then, glue the yellow small teardrop shapes on the thin ends of the teardrop shapes.
Step 3: Make The Base For The Butterfly
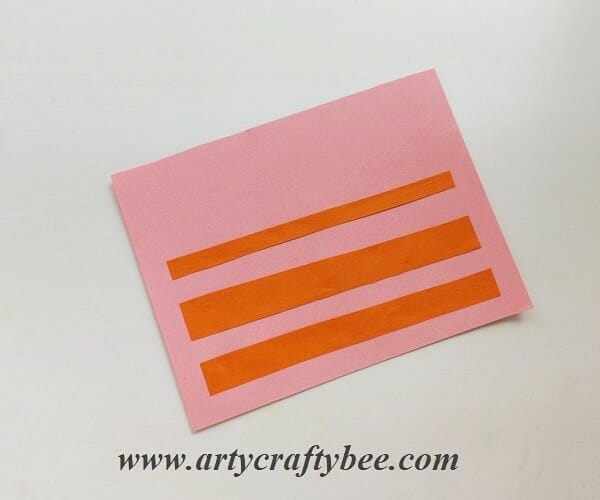


Cut out a pink craft paper according to the circumference and height of your tissue paper roll. Then, glue orange paper cut-out stripes horizontally on the pink craft paper.
Glue the eyes on the top side of the pink craft paper.
Use a black marker pen to draw a smiley face below the eyes. And, use pink marker pens to draw cheeks on the two sides of the mouth.
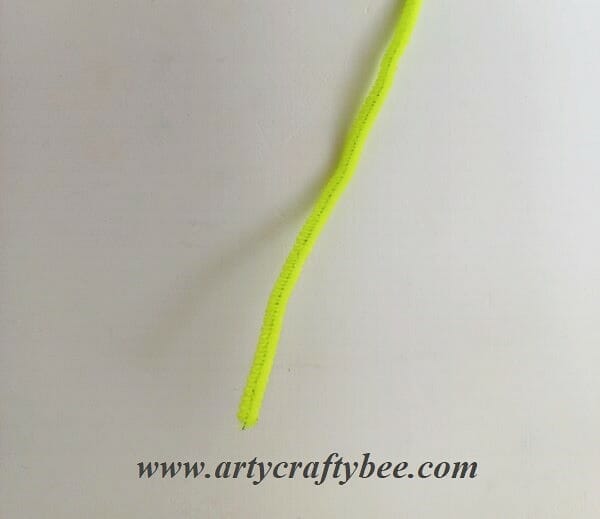
Step 4: Make The Antennas
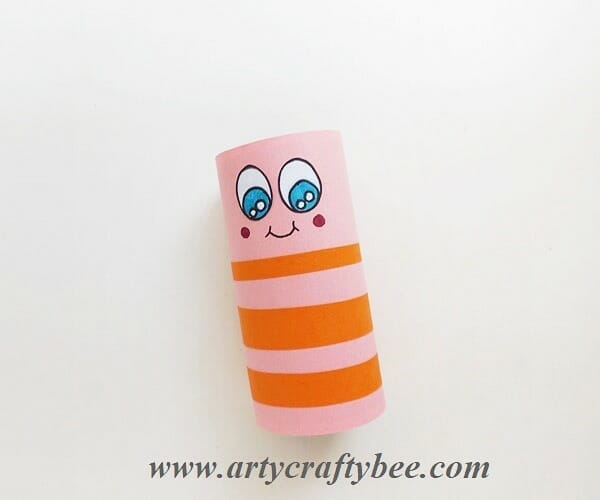
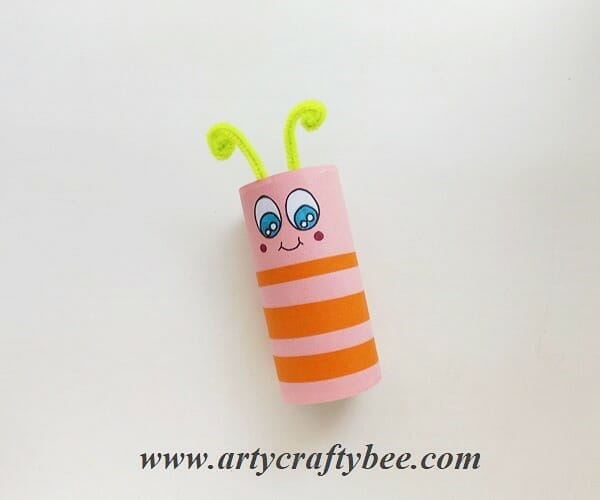
Take a tissue paper roll, and glue the pink base craft paper around the tissue paper roll.
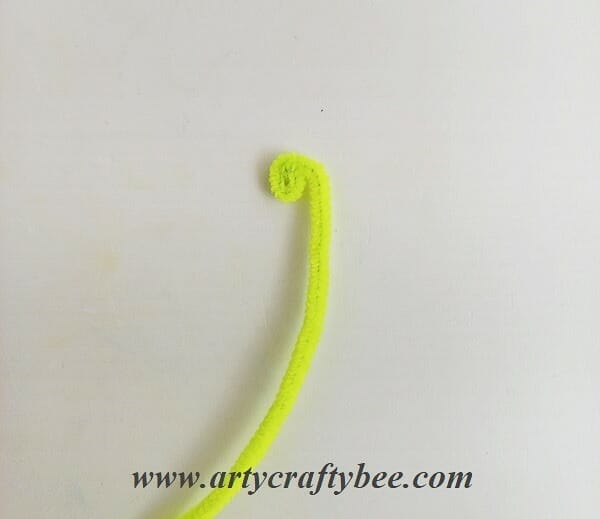
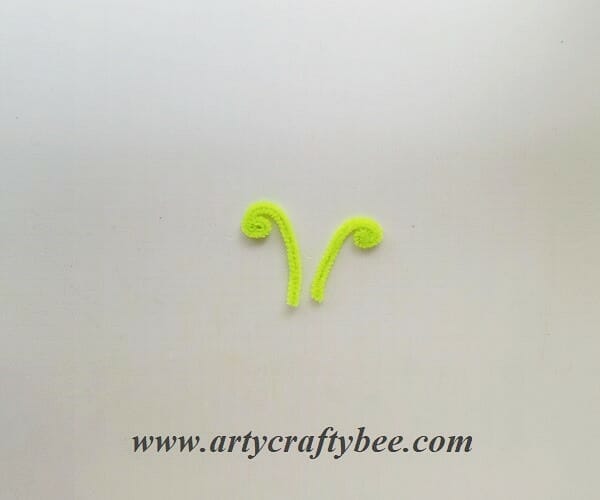
Take a pipe cleaner of a color of your choice.
Cut the pipe cleaner into 2 pieces and bend the ends to make small swirls.
Glue the swirly pipe cleaners inside the top part of the tissue paper roll and keep the swirly parts outside.
Step 5: Glue The Wings


Slightly fold the ends of the paper butterfly wings, and apply glue on the crease.
Glue the wings on two sides of the tissue paper roll to complete your paper butterfly toilet paper roll craft.
Do you like butterfly crafts? I have found a few more butterfly crafts you might enjoy making. Check out this Paper Butterfly Wall Decor by Red Ted Art. You might also like this Paper Butterfly Decorations by Glitters Creations
Before we go, as promised here are 5 interesting facts about butterflies:
- The first fun fact that we all might already know is that caterpillars turn into butterflies. Butterflies and moths both come from caterpillars.
- Butterflies use their feet to taste their food.
- Butterflies use many tricks and techniques to avoid being eaten.
- Butterflies are unable to fly if the temperature drops and they become cold.
- It takes about three weeks for a caterpillar to turn into a butterfly once it is inside its cocoon.
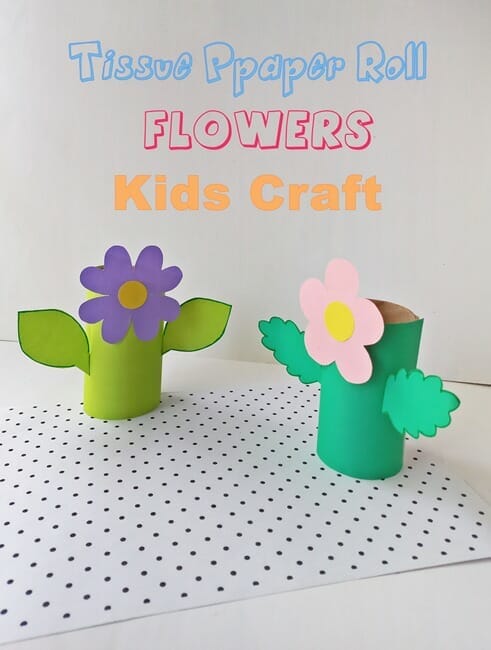
Here is another Tissue Paper Roll craft from arty crafty bee you might enjoy making.
If you make any of our tissue paper roll crafts please share photos with us. Thank you for staying with us. We hope to see you in our next post. I have something similar and interesting coming. See you tomorrow for our next DIY Kids Craft.