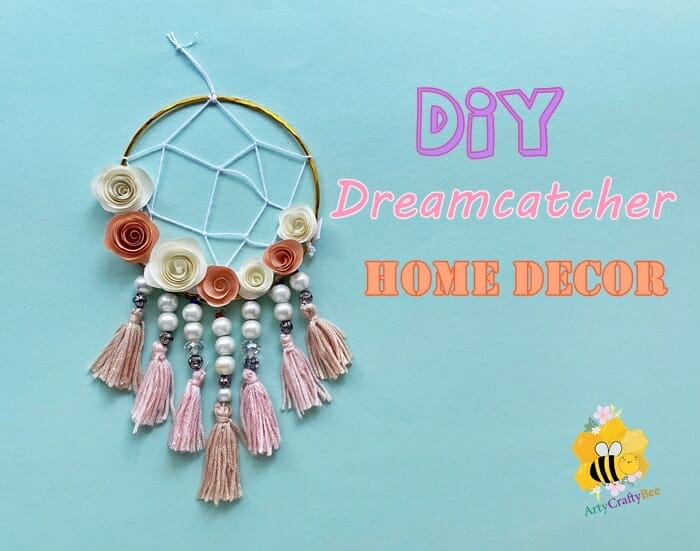
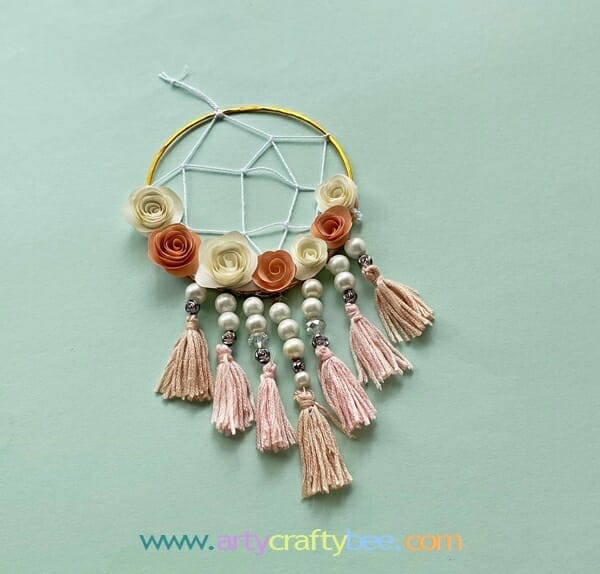
Easy Dreamcatcher Craft Ideas
In today’s tutorial, I have a DIY dreamcatcher craft for older kids. If you are looking for a dream catcher craft for kindergarten, with the help of adults kids can also make this fun and easy dream catcher craft. Make dreamcatcher at home with these easy step-by-step instructions,
The meaning and origin of dreamcatchers come from the Native American cultures. I won’t get too deep into the conversation because I only did some research on the web, I don’t know the meaning behind this amazing craft. But I want to share a tutorial on how to make an easy dreamcatcher at home. From many website articles, I have read that dream catchers can cleanse your dream. Especially for children, the web catches bad dreams or any harmful dreams. A group of Native North American people “Ojibwe”, used to hang dreamcatchers above the bed to protect people and children from nightmares, that is where dreamcatchers originated from.
It took me a while to actually get these knots right. I kept messing up and everything looked very bad and knotted. If you are making this dreamcatcher craft, I suggest that you use thick twine or thread to make the web, especially if kids are making it. I used a slightly thin thread. But for kids, it is easier to make this dreamcatcher craft using thick threads. I made this dreamcatcher as a pendant. using this dreamcatcher tutorial you can make dreamcatchers in any size you want.if you want to make a large dreamcatcher craft you need to make it with thicker gauge wires and also use thicker threads to make the tassel.
So without further due, let’s start making our dreamcatcher craft.
How To Make A Dreamcatcher Instructions (step-by-step):
List of supplies:
- Wire.
- Threads.
- Needle.
- Beads.
- Craft paper.
- Scissors.
- Hot Glue.
- Pliers.
- Scissors.
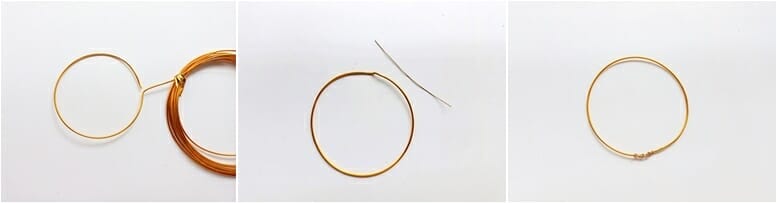
Step 1:
To make your dreamcatcher craft you need to select what kind of wire you want to use for it and what wire gauge you need. Since this is a kid’s craft and easy craft O will be using a wire that is easy to bend.
Use a round pot to make a round shape with the wire.
Step 2:
Now take a thin wire that is thin and easy to bend.
Step 3:
Use the thin wire to wrap and join both ends of the round wire base for our dreamcatcher craft.

Step 4:
Select a long white thread or twine for your dreamcatcher’s web.
Take the end of the thread and tie a knot on the dreamcatcher’s base (the hoop).
Step 5
Pull the thread diagonally a few centimeters away from the first knot.
Step 6:
Then, tie another knot on the hoop with the thread.
Step 7:
Now pull the thread diagonally again, to a few centimeters away from the second thread.
Step 8:
Similarly, make two more knots creating a pentagon shape. To create a different shape with the thread, just make more knots.

Step 9:
To make the second web, tie a knot on the middle part of any threads from the first web.
Step 10:
Pull the thread diagonally away to another thread and tie a knot there.
Step 11:
Keep making knots and circling back again to the starting point.
Step 12:
Once you are happy with your dreamcatcher’s web, you can tie a knot and cut off the excess thread.
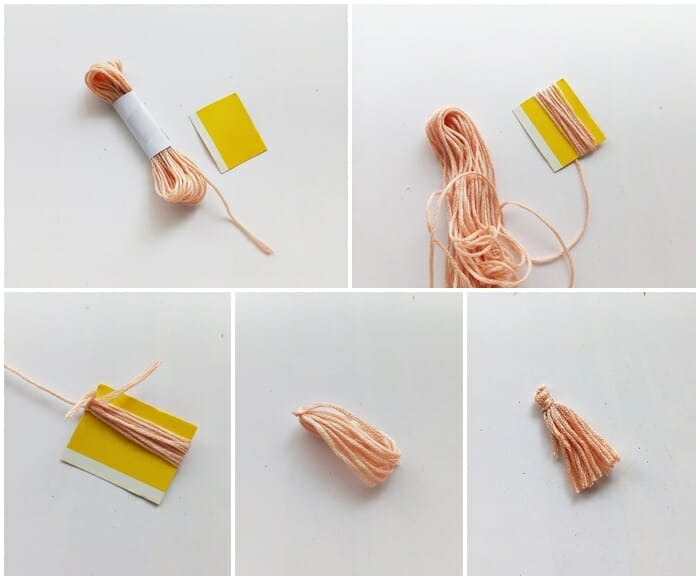
Step 13:
To make your tassel, you need to select some threads and cut out a piece of cardboard according to the size of your tassel.
Step 14:
Take the thread and start making loops around the cardboard to make your tassel.
Step 15:
Make at least 7-8 loops to make your tassel appear prettier. And tie a knot on the top to secure your loop.
Step 16:
Take the tassel out of the cardboard.
Step 17:
Take another piece of the same thread and tie a tight knot on the top of the tassel.
And cut the loops on the bottom to finish making the tassel.

Use the same technique to make the rest of the tassels for your dreamcatcher.
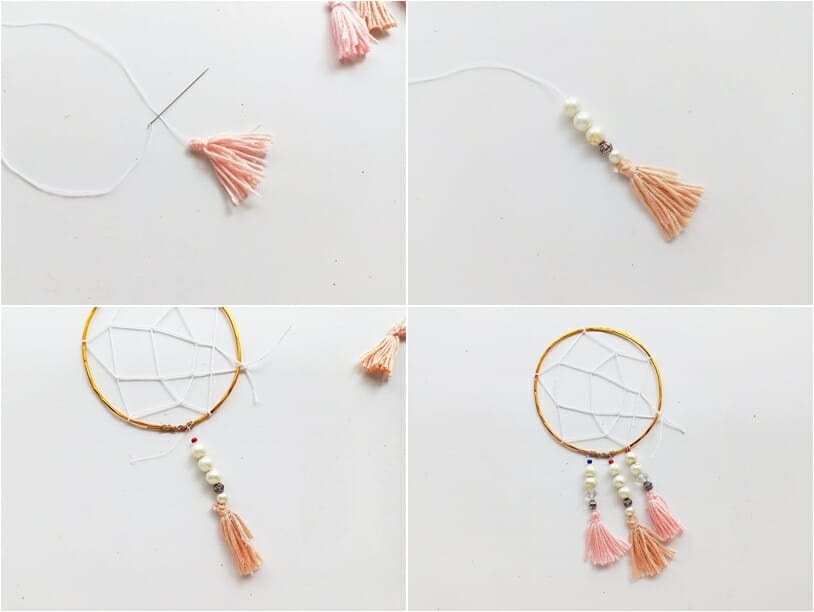
Step 18:
Thread a need;e, then sew it with the top part of the tassel.
Step 19:
Take some beads and pearls, and put them through the needle and inside the thread.
Step 20:
Then, tie the beaded tassel and thread, tie it with your dreamcatcher’s hoop.
Step 21:
Similarly, tie more tassels with the hoop. Remember to make one shorter than the previous one.

Tie all the tassels with the hoop. The tassels on the ends will have the shortest thread, this will add some eye-catching details to the dreamcatcher.
Step 22:
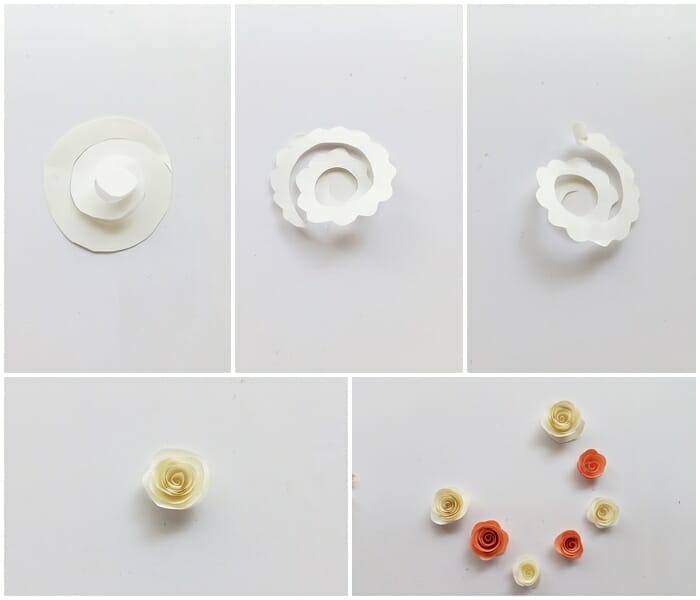
Use the PDF template to cut out the swirly rose pattern.
I learned to make these adorable paper roses from The Craftaholic Witch.
Here is a link to her tutorial on how to make these paper swirly roses.
Step 23:
Make a wavey pattern on the swirly rose.
Step 24:
Start rolling the piece from the front.
Step 25:
Roll it to the center and use glue to secure it.
Step 26:
Make a few more roses.

Step 27:
Glue the paper flowers on the dreamcatcher’s hoop.
Step 28:
To hand your dream catcher tie a piece of twine or thread on the top of the hoop.
Make DIY Dreamcatcher Craft At Home

How To Use A Dreamcatcher Craft:
There are so many ways you can use this dreamcatcher craft. If you are looking for something to decorate your living room with, you can make this dreamcatcher craft. If you make this dreamcatcher craft in a smaller version it can be used as a dreamcatcher pendant. This dreamcatcher craft makes a beautiful wall hanging. You can also hang it near windows as well. If you like to make handmade gifts. you can make this dreamcatcher craft and gift it to your loved ones.
this is where I got the inspiration for this dreamcatcher craft.

We have a few more home decor crafts you might like: