How to Make a Beautiful Quilled Rose Craft
Quilled rose craft ideas for Rose Day crafts and Mother’s Day crafts.
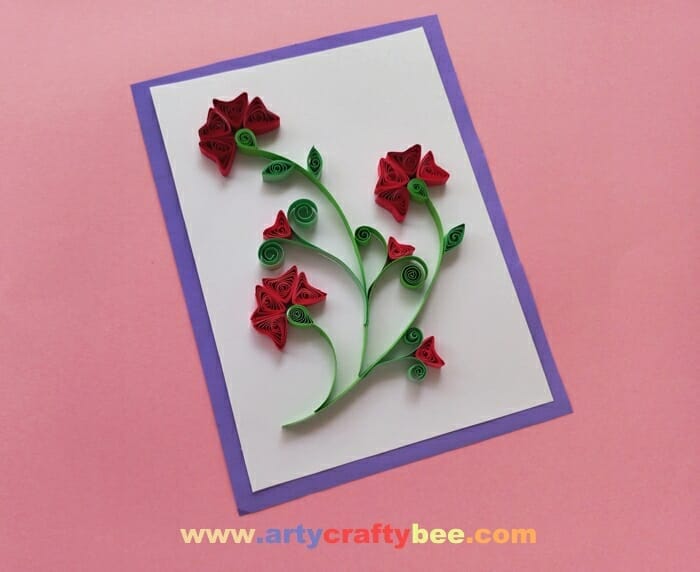
Welcome to the world of quilling, where paper is transformed into beautiful works of art. Today, we’ll explore the art of quilled rose craft, a popular and stunningly beautiful paper craft. With just a few simple materials like quilling paper strips, quilling tools, and glue, you can create an array of gorgeous quilled rose designs. In this tutorial, we’ll guide you through the process of creating a stunning quilled rose, step by step. Whether you’re a beginner or an experienced quiller, this guide will show you how to create a beautiful quilled rose craft that is sure to impress. So let’s get started!
A quilled rose is a beautiful and intricate piece of paper art created by rolling and shaping strips of paper into a three-dimensional representation of a rose. The technique of quilling, also known as paper filigree, has been around for centuries and involves creating designs using strips of paper that are curled, twisted, and arranged into various shapes.
To make a quilled rose, paper strips of different sizes and colors are rolled into tight coils, then pinched and shaped into petals. The petals are then arranged around a center coil to form the rose. The final result is a stunningly detailed and delicate piece of art that can be used to decorate cards, scrapbooks, or any other craft project.
Quilled roses can be made in various sizes and colors, and the technique can be adapted to create a wide range of different flowers and designs. Whether you’re a seasoned quilling expert or a beginner just starting, creating a quilled rose is a rewarding and satisfying project that is sure to impress.
One of the benefits of quilled flowers is their versatility. With a little creativity and imagination, quillers can create an endless variety of flower designs using different colors, sizes, and shapes of paper strips. Quilled flowers can also be combined with other paper craft techniques, such as paper cutting or folding, to create even more elaborate designs.
Overall, quilled flowers are a beautiful and unique way to add a touch of elegance and creativity to any craft project
Learn How to Quill a Stunning Rose with This Easy Tutorial
Tools and Materials For This Rose Quilling Project:
- Quilling paper strips
- Quilling tool
- Glue
- Scissors
- Tweezers (optional)
- Rose template (optional)
- Cardstock Paper.
Instructions:
Step 1: Cut Out Quilling Paper Strips:
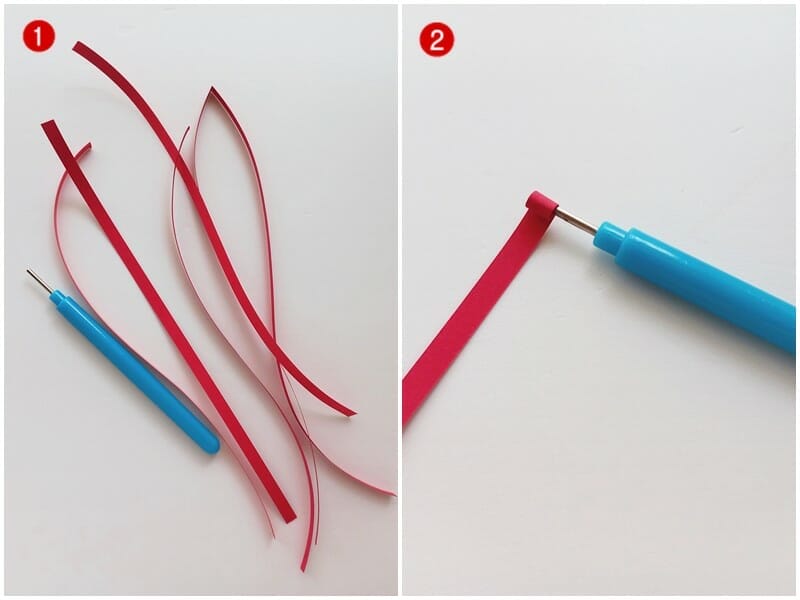
Select a color for your flower then cut out 4 strips to make each flower.
The strips should be 5-6 inches long. Also, fetch your quilling tool.
Start rolling the strips using the quilling tool.
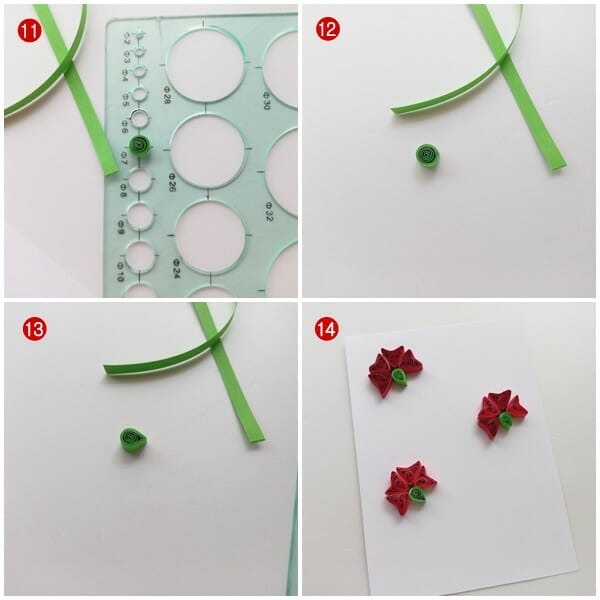
Step 2: Take a quilling paper strip and roll it into a tight coil.
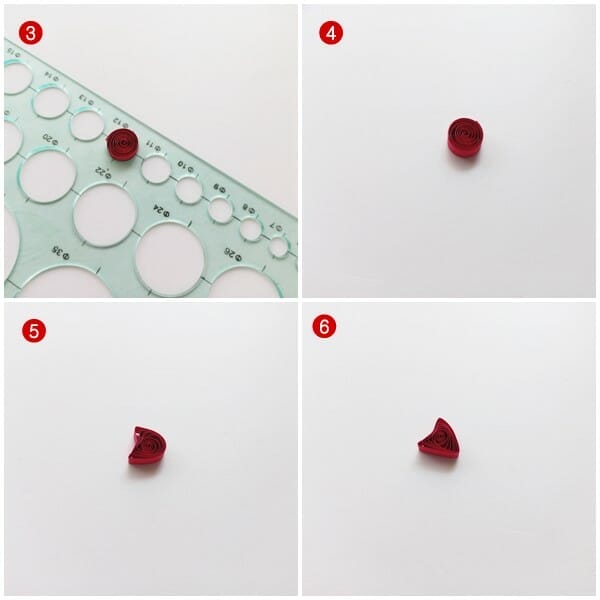
Use the quilling scale to measure the size of each petal. Keep this noted you will need it for the next steps.
Apply glue on the end of the quilled coil to secure the roll.
Use your finger to press down one side of the quilled piece. This will make two pointy edges on the two sides.
Then use your fingers to press the bottom part and make a triangular shape.
Use tweezers to manipulate the petals and shape the rose as desired.
Step 3: Make More Petals and Glue Them On The Card:
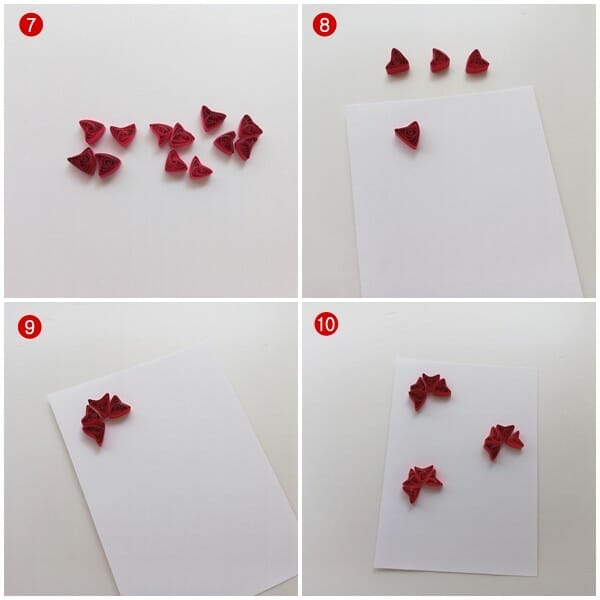
Similarly, make 11 more quilled pieces to make the flower craft.
You’ll need 4 pieces to make each flower.
Select your cardstock paper and start gluing the petals. First glue one petal on the card.
I recommend you place the pieces on the card before gluing and then measure everything (where you want to glue the flowers).
Glue the rest is the 3 petals around the first petal to make your first quilled flower.
Glue the other two flowers quilled petals on the card paper.
Step 4: Take another strip of paper and make a teardrop shape.
Make a coil using green quilling paper.
Glue the end to secure the roll.
Pinch one side of the circular shape to make a teardrop shape.
Make 3 more teardrop shapes and glue them under the flowers.
Step 5: Make The Stem For The Rose
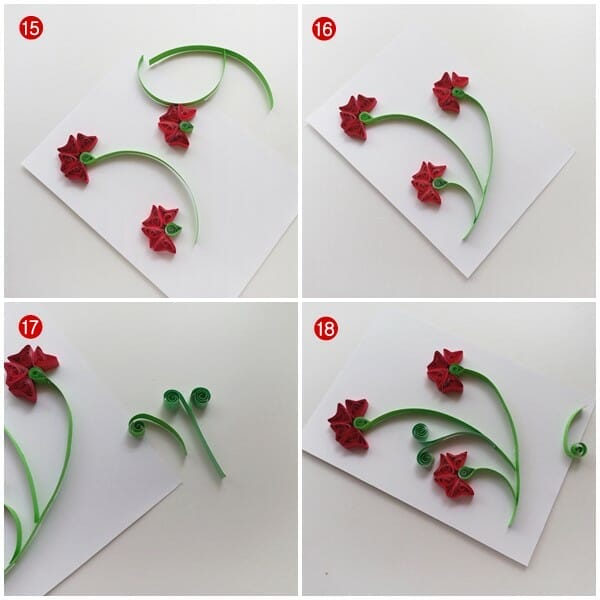
Take 3 green quilled paper strips. Glue one strip on the green teardrop shape, make a curvey line, and glue it on the cardstock.
Glue the other two green paper strips with the flowers as the stems for the flower.
Cut out 3 small green quilling strips (3-4 inches), and make swirls on one end using the quilling tool.
Glue the swirly pieces on the stems.
Step 6: Glue The Flower Bud:
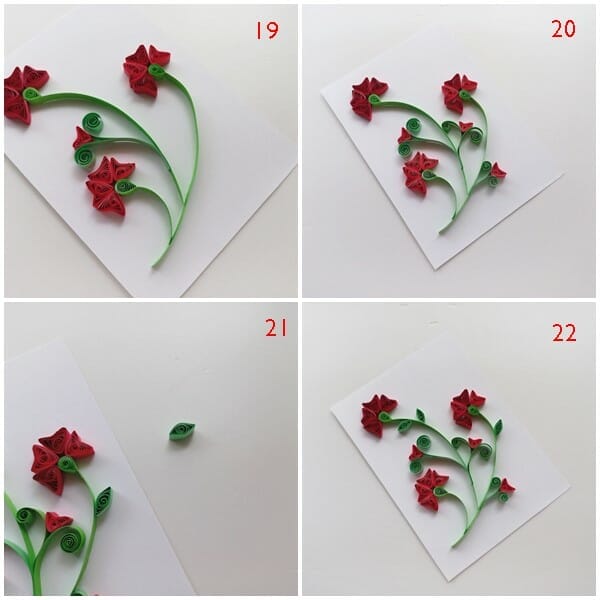
Make petals like we did at the beginning and glue them between the two swirly patterns.
Similarly, glue a few more small petals.
Make a marquis shape green quilled pattern (5-6 inches strip).
And glue them on the stems as the leaves for the flowers.
If using a template, explain how to use it to create uniform petals.
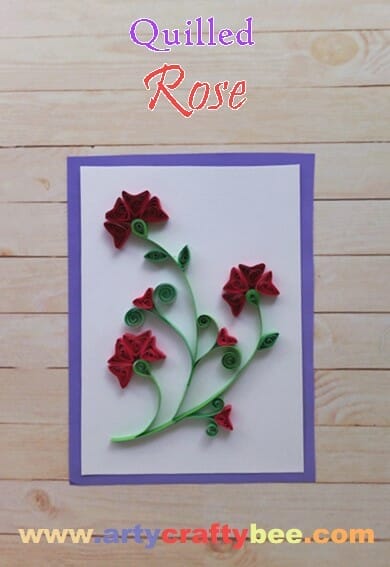
How To Use This Quilled Rose
You can use this craft as it is as card for any occasion.
Frame it as wall art that you can gift someone or hand it at your home.
Use it as a decoration for a gift box or bag.
Do you want to see another rose craft? Here is a How To Draw A Rose Tutorial.
Also, check out these Quilled Cherry Blossoms.
Thank you for staying with us. We hope to see you on our next post.
Red Rose Day is celebrated on June 12th each year. It is a day dedicated to appreciating the beauty and symbolism of the red rose, which is often associated with love, passion, and romance. On Red Rose Day, people may choose to give red roses as gifts, use them in floral arrangements, or simply take a moment to admire their vibrant color and sweet fragrance. It is a special occasion to express affection and convey heartfelt emotions through the timeless and classic symbol of the red rose.