How To Make Paper Pumpkin Craft for Kids (+ Free Template)
You can try out this really easy fun paper pumpkin craft if you are looking for some fun activities for kids this autumn.
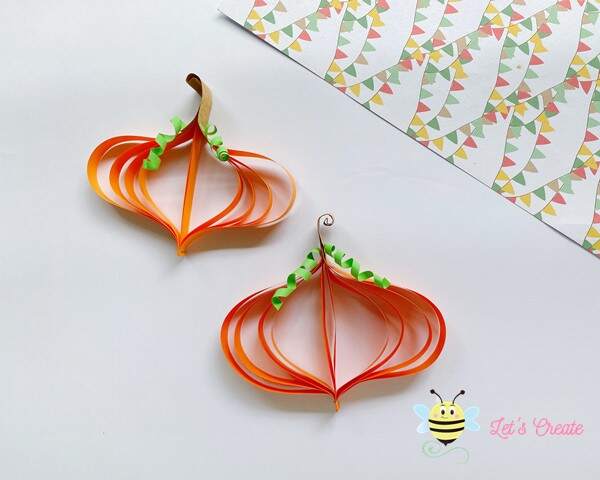
This craft is so elegant and easy, you don’t need to be an expert for making these adorable paper strip pumpkins. The supplies used to make this paper pumpkin craft are very easy to find. You probably have all these lying around the house. This craft can be an amazing accessory for fall/autumn home decoration. This can be a wonderful opportunity to spend time with your family making fall crafts. The bright orange pumpkin decoration can dazzle up your home.
How to Make Paper Pumpkin Craft
Tools and Materials
Here is the list of supplies for these simple but artistic cardstock paper crafts, look around and fetch everything from the list.
- Bright orange craft paper or cardstock paper.
- Green craft paper.
- Brown cardstock paper.
- A pair of scissors.
- Pencil or pen.
- Ruler.
- Thread (Optional).

Free Pumpkin Template
Click to download the PDF template that is attached with this tutorial and print it out.
Paper Pumpkin Craft Step by STep Instructions
Time needed: 15 minutes.
Hope you have collected all the supplies to make this paper pumpkin craft. So, without any further ado let’s get started with this eye-pleasing paper pumpkin craft.
- Cut and Shape the Paper Stips
Cut the paper strips out of orange craft papers using the templates.
There are five different lengths of paper strips.
You can also cut these out without the templates.
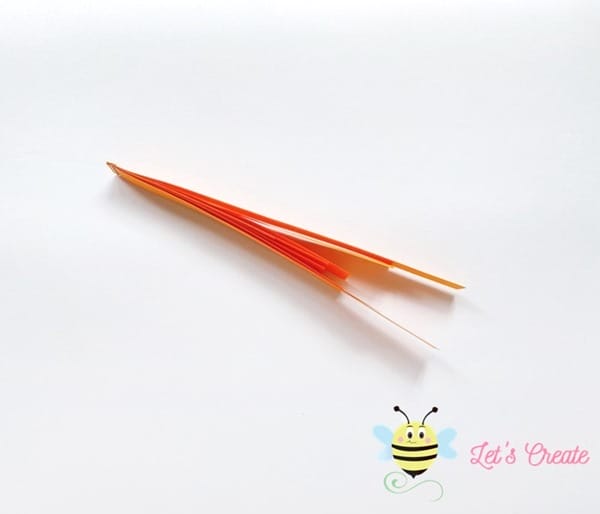
First, cut ten paper strips about 10 inches long and 1-inch wide.
Make sets of two (five sets in total), and make one set slightly shorter than the other.
- Make 2 Sets of Paper Strips
Now, make two sets of paper strips each set including all five sizes. Place them from largest to smallest.
- Combine Both Sets
Place both sets together facing each other. The largest strips should be on the outer side and the small ones in the middle. Then staple the top of all the strips together.
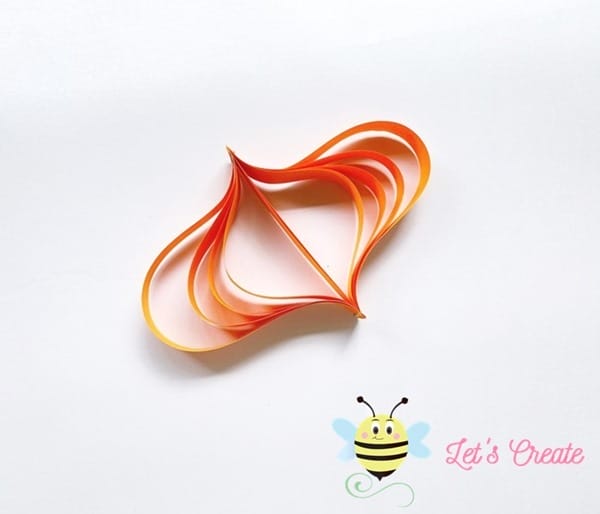
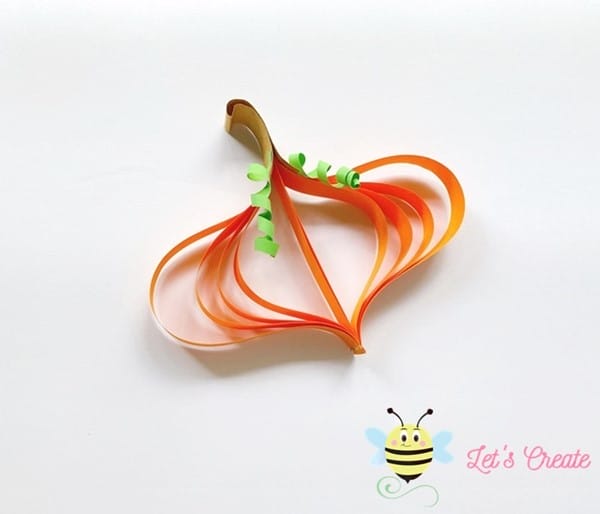
- Create the Pumpkin Shape
Align the strips on the other end. Grab all the paper strips and staple the ends together. This will create the pumpkin shape.
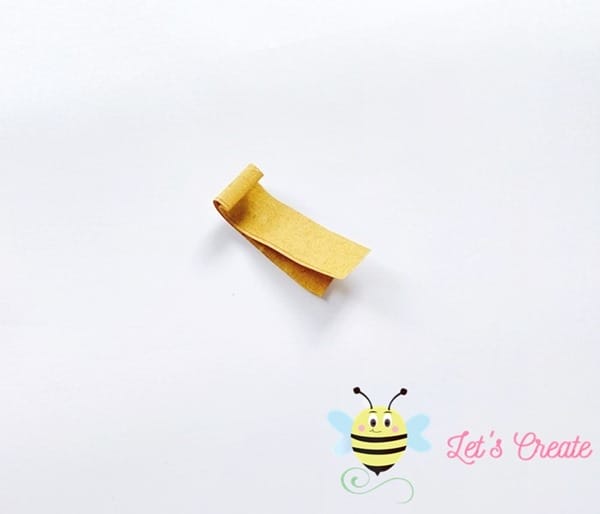
- Make the Pumpkin Stem
Now, take 3 inches long and 1-inch wide brown cardstock paper. Fold the cardstock paper in half. Use your fingers or a pencil to roll the closed end of the cardstock and make it swirly. This will be the stem for our pumpkin.
- Attach the stem with pumpkin-shaped paper stripes
Then, take the stem and staple or hot glue it with the pumpkin. Place the top end of the pumpkin in between the folds of the stem and apply glue or staple it.
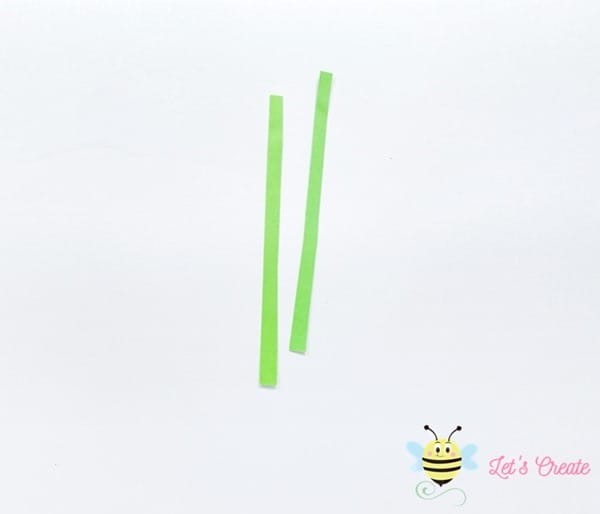
- Prepare Cardstock Paper to Make Vines
The next step is making the vines. Take and green shades cardstock paper or craft paper. Cut out two or more strips (according to your choice). The strips should be at least 6 inches long and 0.5 inches wide.
- Complete Making the Vines
Take a thin pencil or a toothpick and roll the green paper strips around it to make springs. These will be vines for our paper pumpkin.
- Attach Vines with The Pumpkin Craft
Now, glue the vines around the paper pumpkin’s stem. Allow the glue to dry.


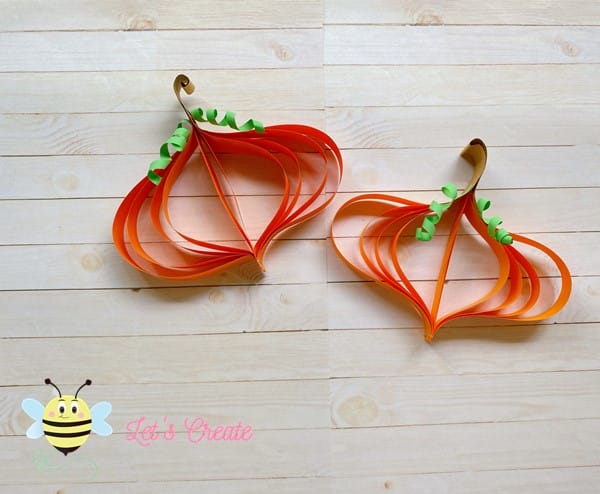
Yey, Your Paper Pumpkin Craft is ready!
If you want to hang these paper pumpkin crafts, just tie some threads or twines around the stem. Similarly, make another or more pumpkins to decorate your home for this fall season.
Hope you have enjoyed this adorable paper pumpkin craft and do share your thoughts on the comment section if you have tried this at home. Stay tuned on our blog to see more exciting kids crafts!
You want to try out more fall crafts? We have tons of fun fall craft tutorials here at Arty Crafty Bee