Rose Drawing Easy For Valentine’s Day
Are you looking for a rose drawing tutorial? Well, here I am with a rose drawing tutorial that is so easy that anyone can draw this.
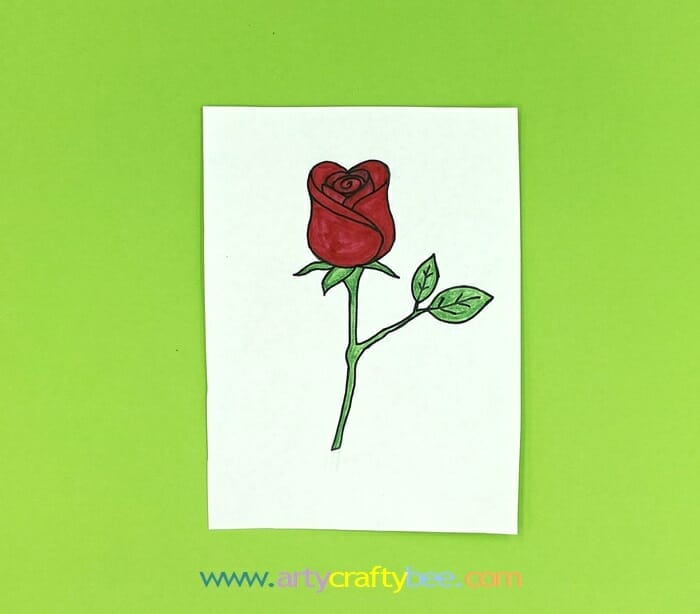
You might think that this rose drawing tutorial is too long and too difficult, but the reason I have so many pictures is I tried to make a rose drawing easy step by step. I have taken pictures of every single detail I could possibly give you to help you draw an easy rose.
Previously I did a drawing tutorial on How To Draw A Christmas Tree. The Christmas tree drawing was slightly easier from this rose drawing tutorial. I have so many drawing tutorials piled up on my computer but I have been so busy with work that I couldn’t upload them. I finally got the chance to share this idea with your guys today. So please stay tuned and check out these rose drawing images.
How To Draw A Rose Easy
Drawing Supplies For Rose Drawing:
- Sketchbook.
- Pencils (HB, 2B).
- Eraser.
- Sharpener.
- Ruler (optional).
- Colorful Sharpies.
- Black Gel Pen.
Rose Drawing Step By Step Instructions:
Steps 1-2-3-4: Petal Drawing:
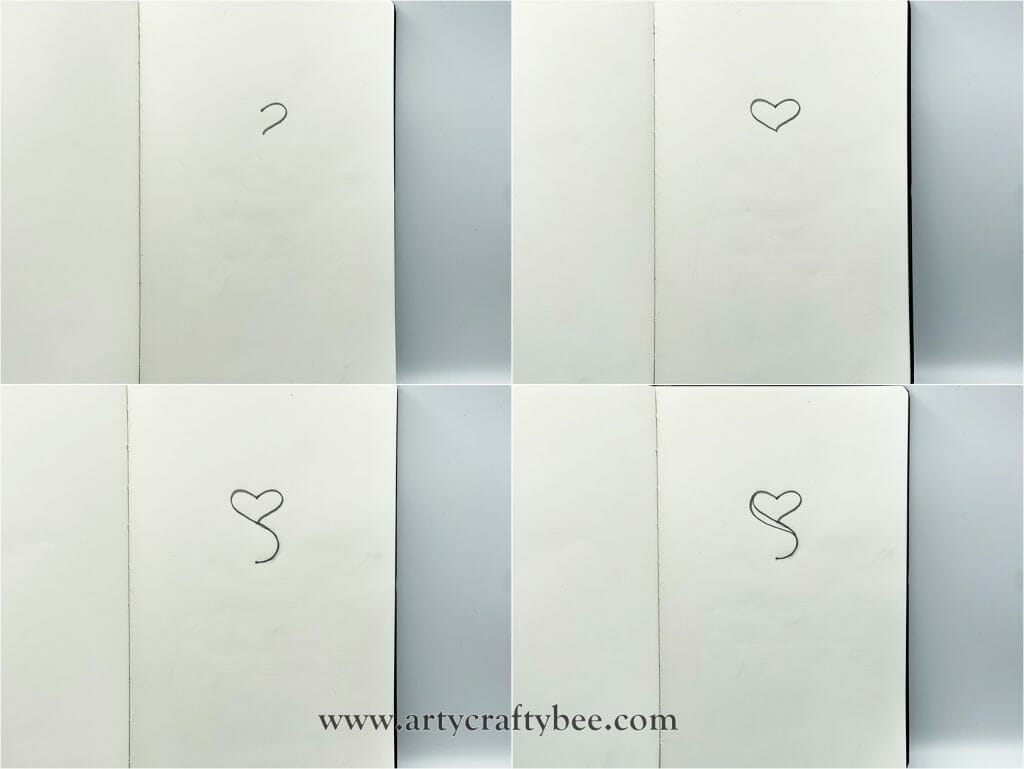
First, draw a curvy heart shape to start drawing your rose.
Draw a curvy line from the bottom point of the heart.
Then, draw another curved line from the left side of the heart to the middle of the last curved line. Keep a slightly small gap between the two lines.
Steps 5-6-7-8: Draw Details On The Petals:

Draw a wavey line from the left side of the heart to the bottom of the middle curvy line. Make the wave broader on the bottom side.
Similarly, draw another wavey line from the right side of the heart.
Draw an oval shape inside the heart
Then, draw swirls inside the oval shape.
Steps 9-10-11-12: Draw The Rose Sepals:
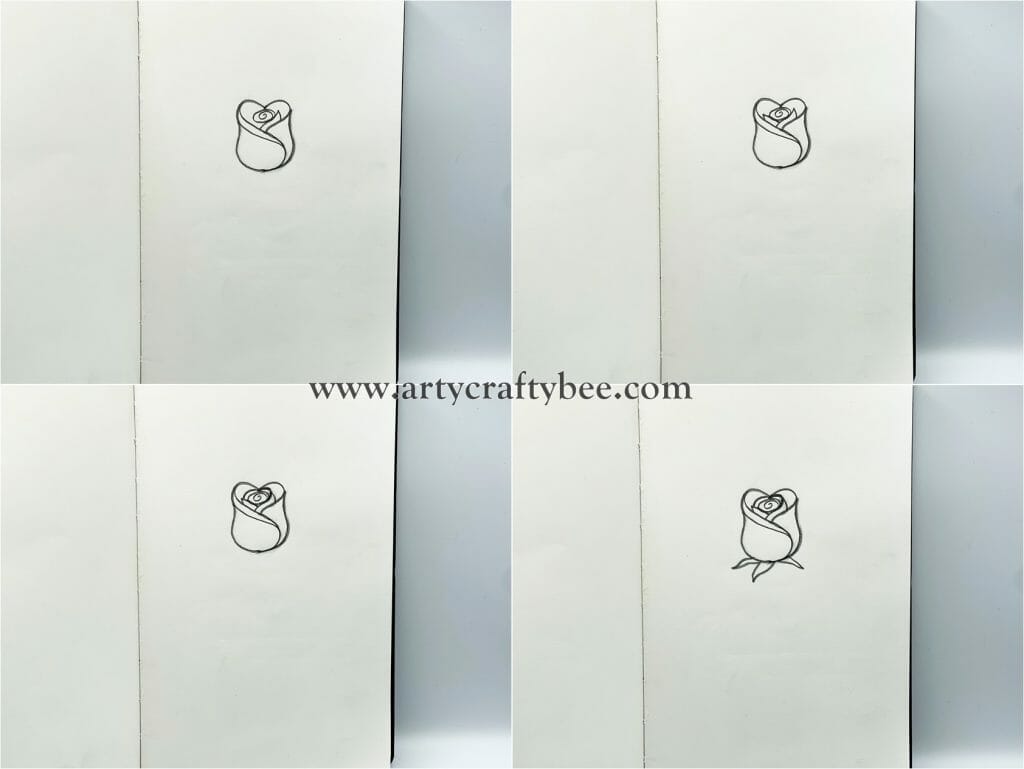
Draw a small petal on the right side of the oval shape.
Then, draw another wavey petal shape on the left side of the oval shape.
Draw another layer of two curved lines from the two ends of the previous petals.
To draw the sepals, draw three squiggly triangles on the bottom of the rose.
Steps 13-14-15-16: Draw The Stem:
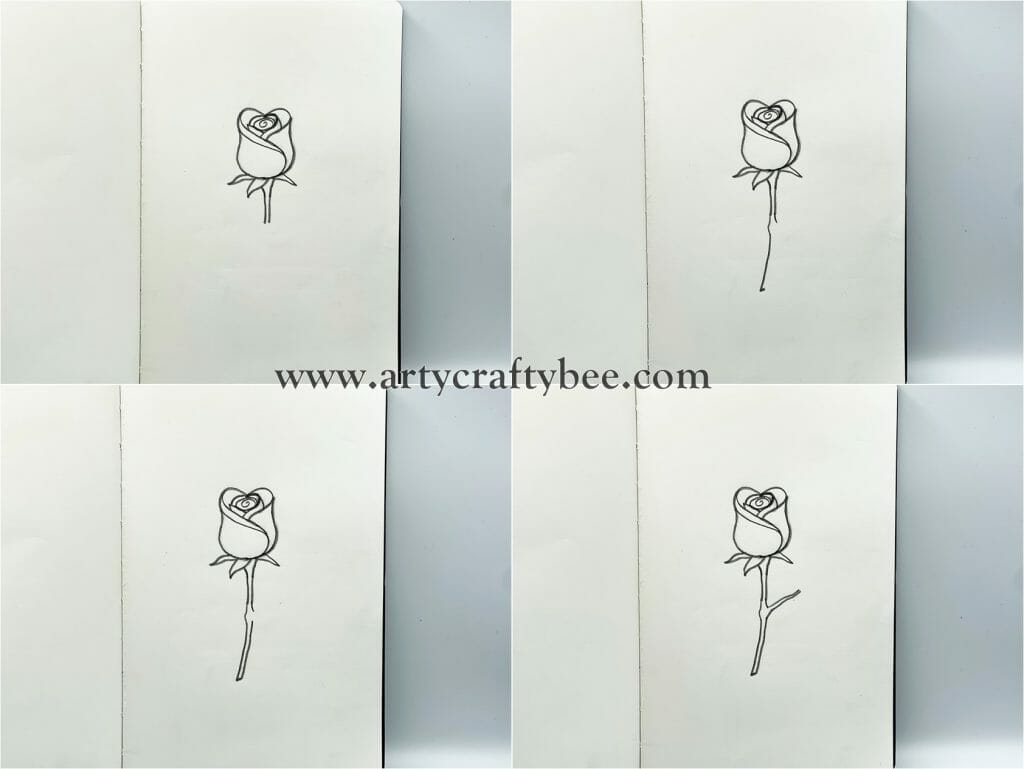
To draw the stem, draw two vertical parallel lines from the middle bottom part of the rose.
Extend the line from the left side slightly further to the bottom.
Draw another vertical line on the left side, and keep a slight gap from the top line. Tip: don’t draw straight lines, make them a little squiggly to make the rose look realistic.
Draw two squiggly lines on the left joining the gap.
Step 18-19-20-21: Draw The Leaves:
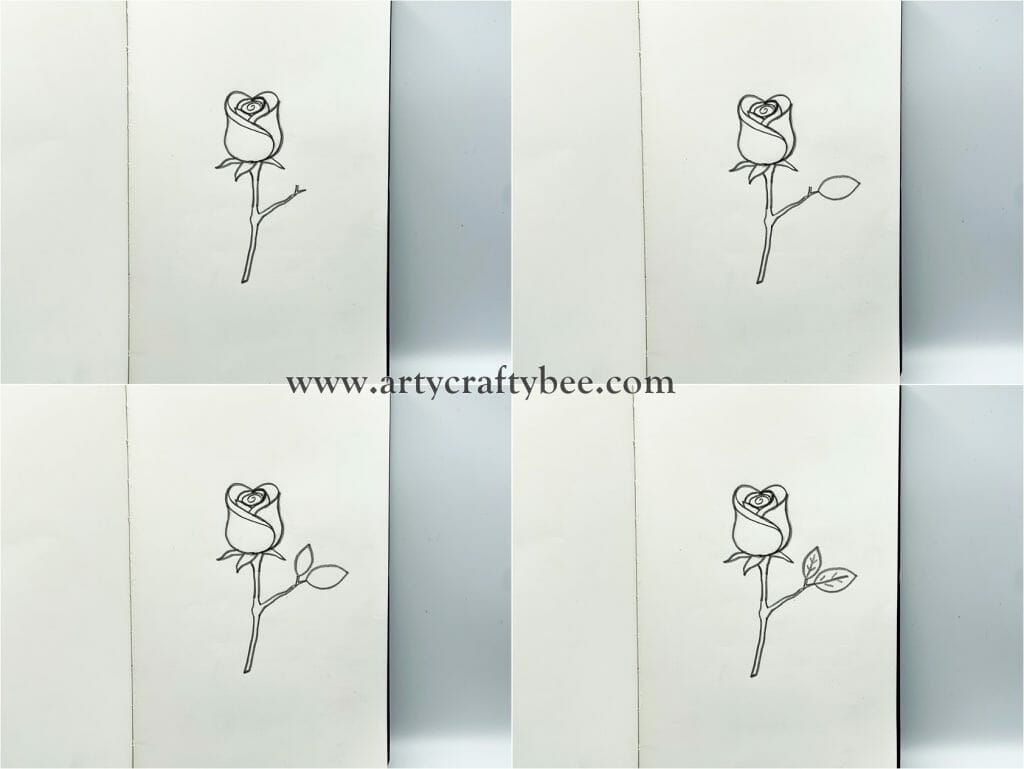
Draw a “Y” shape on the tip of the extended line.
Then, draw a basic leaf shape.
Draw another basic leaf shape.
Draw the veins inside the leaves.
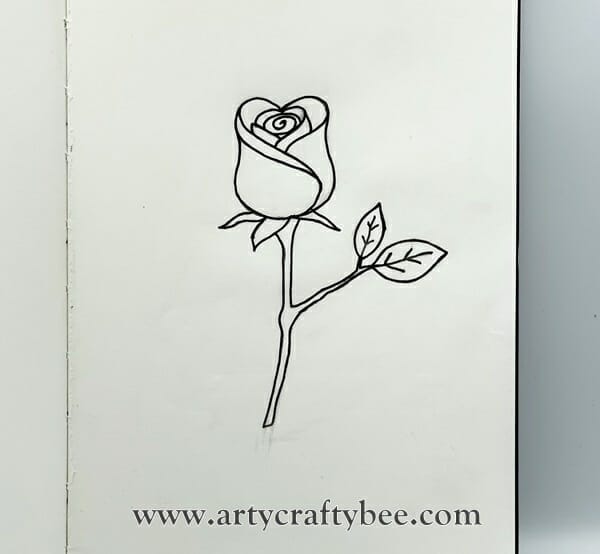
Use a thin gel pen to draw over the pencil lines of the rose. Then erase the pencil lines using an eraser. Pencil outlines often smudge and ruin the cleaners of the drawing, so before coloring it’s better to erase the pencil lines.
Final Step: How To Color The Rose:
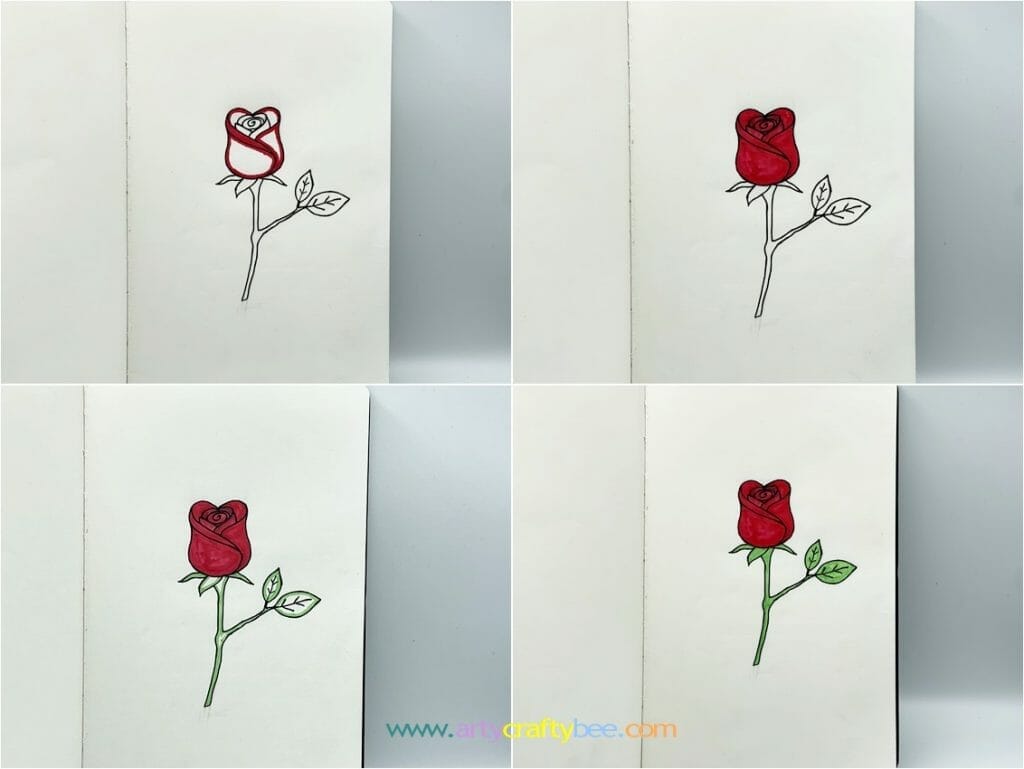
Take a red sharpie and carefully color the inner outline of the rose outline.
Then, fill in the rose outline using the same red sharpie or a red marker pen.
Similarly, use a green sharpie or marker pen to color along the outline of the stem and leaf carefully.
Fill in the leaves and stem using the green sharpie.
You can leave it as it is, but for extra details, you can color the corners using a slightly darker green sharpie.
You can use colored pencils, colored crayons, or even watercolor to fill the rose drawing outline.

I hope you all enjoyed this rose drawing detailed tutorial. This rose drawing outline and coloring tutorial is relatively easier than some other rose drawing hard tutorials. I think this rose drawing tutorial will be helpful for older kids who love to sketch, draw and doodle.


